8-Bit Tower Defense Team Builds and Early Story Squads
Build around the enemies your squad needs to stop. Start with an early Normal story team, then use your remaining slots for missing air coverage, armor piercing, control or support.
For early Greenfield Outpost Normal, use Honey Bee, Poison Dart Frog and Glacier Penguin—a squad with clears through Act 3. Glacier Penguin, Pill Bug and Web Spider offer a control-focused Act 2 alternative; Quill Porcupine, Spine Hedgehog and Blade Mantis also cleared Act 3. Choose Pebble Frog for a cheap starter, Honey Bee for multiple-bee synergy or Dart Dragonfly for periodic bursts. Keep air coverage active before spending on support or economy.
Choose a Starter for Your Opening
Complete training to choose a starter that permanently joins your collection. All three starters can attack flying enemies immediately.
| Starter | Deployment | Opening strength | Armor piercing |
|---|---|---|---|
| Pebble Frog | 150 battle cash | Cheap, long-range shots | Battle upgrade 3 |
| Honey Bee | 175 battle cash | Fast attacks; bee synergy | — |
| Dart Dragonfly | 200 battle cash | Every fourth attack: 3 darts | Battle upgrade 3 |
- Choose Pebble Frog for a flexible, inexpensive opening. Its single-target stone attacks give you ranged coverage while leaving more cash for a second unit. Tongue Whip adds armor piercing at battle upgrade 3.
- Choose Honey Bee if you want to deploy multiple bees. Each additional bee contributes to Hive Mind, so extra placements strengthen the swarm as well as adding another attacker. Its support interactions matter when deciding between another bee and an upgrade.
- Choose Dart Dragonfly for periodic burst attacks. It attacks one enemy at a time and fires three darts rapidly every fourth attack. Armor piercing arrives at battle upgrade 3.
Use the unit directory to find additional units as you expand beyond your starter.
Build a Three-Slot Normal Story Squad
Choose a squad whose units you own, then concentrate spending on positions that can keep attacking along the route.
Honey Bee, Poison Dart Frog and Glacier Penguin
This is the strongest starting recommendation here for progressing through the first three Greenfield Outpost Acts on Normal: it combines inexpensive attacks, armor-ignoring poison and group freeze. The squad cleared Acts 1–3, including zero-leak clears of Acts 2 and 3.
- Open with Honey Bee and Poison Dart Frog beside the road. Their deployment costs are 175 and 450 battle cash.
- Add more bees as funds allow, then deploy Glacier Penguin for 850 battle cash. Place its freeze coverage where the attackers can keep hitting affected enemies.
- Upgrade your deployed damage units and the penguin. Packed Snow costs 450 battle cash and increases the penguin's range and snowball size.
- Build toward the penguin's later control upgrades while maintaining damage along the route. Belly Slide unlocks at battle upgrade 3 and hits enemies along a long stretch of road, freezing them for 1.5 seconds.
Honey Bee and Poison Dart Frog provide immediate air coverage; Glacier Penguin gains air targeting at battle upgrade 5.
Glacier Penguin, Pill Bug and Web Spider
Choose this squad when you want freeze, knockback and slow working together. It defeated Old Croaker in Greenfield Outpost Act 2 with a penguin upgraded to 4/5.
- Open with Glacier Penguin beside the route for group attacks and freeze.
- Add Pill Bug close enough to the road for its short-range knockback to connect.
- Place Web Spider toward the earlier part of the route, so its slowing attacks and road webs affect enemies approaching your main attack area.
- Improve useful control positions: Packed Snow expands penguin coverage, Long Legs improves Web Spider's range and slow, and later penguin upgrades add stronger attacks. Hailstorm at upgrade 4 increases damage and attack speed.
Web Spider supplies immediate air targeting. Keep its coverage useful while the penguin is below upgrade 5.
Quill Porcupine, Spine Hedgehog and Blade Mantis
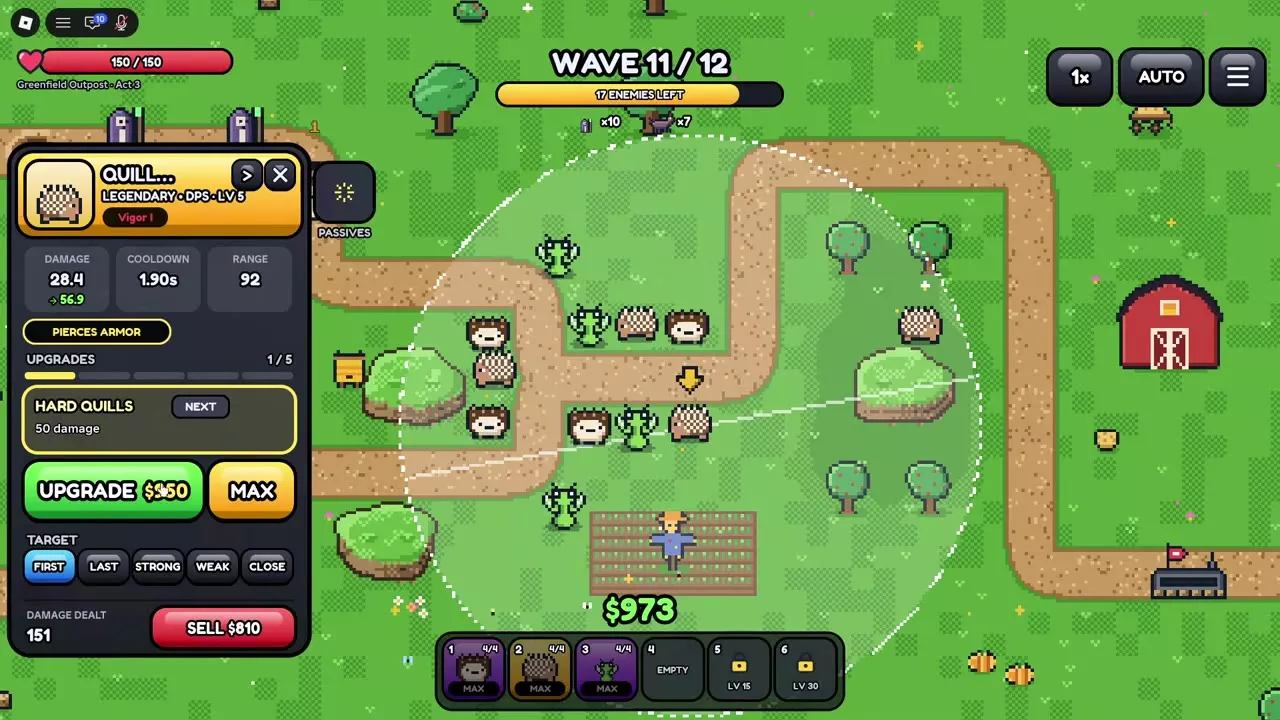
Choose this combination for heavy armor-piercing attacks backed by close-range area damage. It defeated Blightbough in Greenfield Outpost Act 3 after Spine Hedgehog replaced Pebble Frog in the squad.
- Opening: Quill Porcupine costs 900 battle cash and provides armor piercing immediately. Place it to cover a useful stretch of road, then add the shorter-range units as funds arrive.
- Placement: Put Spine Hedgehog near bends where enemies enter its surrounding spike attacks. Place Blade Mantis beside a close pass so its cone can reach the road.
- Upgrade priorities: Long Quills improves Quill's range and attack speed. Quill gains air targeting at upgrade 3; Spine Hedgehog gains it at upgrade 1. Prioritize one of those unlocks before flying enemies arrive. Both Spine Hedgehog and Blade Mantis gain armor piercing at upgrade 3.
This lineup uses area damage rather than a dedicated control slot. Cover the route with overlapping attacks instead of leaving the short-range units far from passing enemies.

Fill Gaps in Air, Armor and Shield Coverage
Choose a replacement for the enemy type or attack pattern your team is missing. An unlock several upgrades away does not cover an immediate threat.
Air coverage and attacks across groups
- Ember Firefly: Deploy for 275 battle cash when flying enemies are the immediate problem. Basic sparks deal double damage to flying enemies. Firefly Swarm at battle upgrade 3 bounces across four enemies and deals triple damage against flying enemies.
- Lantern Jellyfish: Use it for immediate air targeting alongside range support. Chain Sting at battle upgrade 3 can jump across up to six targets; armor piercing unlocks at upgrade 5. Its Bioluminescence passive also gives nearby units 5% extra range.
- Bubble Crab: Deploy for 550 battle cash when you want splash attacks that can also hit air. Its bubbles explode on impact. Battle upgrade 3 unlocks armor piercing and Bubble Beam.
Firefly is the direct choice for its flying-target damage bonuses. Jellyfish combines attacks and support, with chain coverage arriving later. Bubble Crab offers impact explosions without waiting for an air-targeting upgrade.
Armor and shields
- Quill Porcupine: Choose it for heavy attacks that pierce armor before any battle upgrades. Budget for its 900-cash deployment and keep another air attacker until Quill reaches upgrade 3.
- Poison Dart Frog: Deploy for 450 battle cash to stack poison through repeated hits. The poison ignores armor, and the frog can attack flying enemies immediately.
- Salamander: Choose it for ground burn and shield breaking. Melt makes its burn deal double damage to shields; armor piercing unlocks at battle upgrade 3. Its cone-shaped fire cannot hit flying enemies, so pair it with air coverage.
Armor piercing and shield breaking solve different problems. Use the enemy counters guide to match your damage type to the threat.
Close-range damage, knockback and marks
- Blade Mantis: Use heavy cone-shaped melee attacks where the road passes close to its position. Armor piercing unlocks at battle upgrade 3.
- Spine Hedgehog: Use surrounding spike attacks at a bend or central pass. Air targeting unlocks at upgrade 1 and armor piercing at upgrade 3.
- Archer Fish: Deploy for 500 battle cash when knockback would keep enemies in the team's attack area longer. Its water jet pushes enemies back, and Splashdown also knocks back enemies near the target.
- Chameleon: Add a ranged attacker that amplifies team damage through critical-hit marks. Air targeting unlocks at battle upgrade 2 and armor piercing at upgrade 3.
Choose Mantis or Hedgehog when you have a strong close-range position. Choose Archer Fish when pushback improves the time enemies spend under fire, or Chameleon when several attackers can exploit the same marked target.
Place Control Before and Inside Your Damage Area
Control earns its slot when it keeps enemies where your attackers can reach them. Preview the unit's coverage before placing it, then select the deployed unit to inspect its range and upgrade options.
- Web Spider: Place it toward the front of the route. Its attacks slow enemies, and its road webs slow enemies that cross them. This gives the main damage area more time to attack approaching targets.
- Glacier Penguin: Overlap its attack area with your damage units' coverage. Freezing a group within that overlap lets several attackers use the same opening.
- Pill Bug: Place it close to the road. Its level-1 range is 19, compared with Web Spider's 39 and Glacier Penguin's 48 in the early control setup. A distant position can leave its knockback out of reach.
- Puffball: Place its forward cone across a passing section of road. Drowsy gives each spore hit a 10% chance to put an enemy to sleep; Spore Bomb unlocks at battle upgrade 3.
- Frost Newt: Put its slowing cold mist in front of approaching enemies. It can target air before upgrading, and Frost Nova unlocks at battle upgrade 3.
Keep the positions doing useful work. In an early Greenfield layout, a rear Web Spider contributed little and was sold while the forward spider remained. If enemies are already being stopped farther forward, redirect that rear placement's cash into the active defense.

Choose Damage, Range or Attack-Speed Support
Choose support for the attackers and road positions you already use. Keep the intended recipients inside the relevant buff's coverage, or concentrate fire on enemies carrying a damage-amplifying effect.
| Support | Effect | Condition |
|---|---|---|
| Glow Worm | +6% damage | Level 1; radius 34 |
| Sharp-Eyed Owl | +8% range | Level 1; radius 36 |
| Lantern Jellyfish | +5% range | Nearby units |
| Chirp Cricket | +50% attack speed | 6 seconds every 40 seconds |
| Chameleon | +15% damage taken | Critical-hit mark; 2 seconds |
| Glacier Penguin | +30% damage taken | Frozen; before upgrade 5 |
| Glacier Penguin | +45% damage taken | Frozen; upgrade 5 |
- Choose Glow Worm when covered attackers need more damage. Center the aura on useful attackers rather than placing it where few units benefit.
- Choose Sharp-Eyed Owl when extra reach adds road coverage. Its range aura is especially useful when it lets existing attackers reach another pass or keep firing for longer.
- Choose Lantern Jellyfish when you want range support and another attacker in the same slot. Its passive offers a smaller range bonus than the level-1 owl aura, while the jellyfish also supplies its own air attacks.
- Choose Chirp Cricket for periodic attack-speed bursts. Keep your main attackers within Chorus coverage so they benefit during its six-second window.
- Choose Chameleon when multiple attackers can focus the same enemy. Color Shift triggers on critical hits and makes the marked enemy take 15% more damage from all sources for two seconds.
- Use Glacier Penguin to combine control with damage amplification. Permafrost increases damage from all sources while enemies are frozen: 30% before upgrade 5 and 45% at upgrade 5. Place attackers so they can fire into that freeze area.
Build Honey Bee around other deployed bees
Hive Mind gives a Honey Bee 4% extra damage for each other Honey Bee on the field, capped at 24% before Beeline. Six other bees reach that cap.
Beeline adds a straight-line attack that stings every enemy along its path and raises the Hive Mind cap to 40%. With a placement limit of 10, a field containing only your own 10 Honey Bees gives each bee nine others to count: 36% extra damage under the per-bee rule.
Additional bees therefore add both another attacker and a bonus to existing bees. Balance those placements against upgrades and any coverage your team still needs.
Use Extra Slots for Summons or Economy
The fourth squad slot unlocks at player level 5. For the Honey Bee, Poison Dart Frog and Glacier Penguin team, Chameleon is a useful fourth choice when you want another ranged attacker and critical-hit marks that amplify the team's damage.
King Slime for road summons
Choose King Slime when you want summons traveling along the road alongside your direct attackers. Deployment costs 1,000 battle cash, with a placement limit of two.
Its level-1 setup sends a Slimeling every 12 seconds. Bouncy Slimes costs 600 battle cash, strengthens those summons and reduces the interval to 10 seconds. Royal Guard at battle upgrade 3 lets the king throw slimes at nearby enemies and unlocks Loyal Subjects, which makes slimes split into two mini slimes after impact.
Reserve a position where the king's own attacks can reach the road after Royal Guard. A remote spawning position sacrifices that later contribution. If placement shows Too close to the path, move the preview farther from the road.
Keep direct air attackers alongside this setup. The slimes used in the Halloween defense could not attack flying enemies; Ember Firefly and Web Spider supplied the needed air coverage.
Lucky Cat for later spending
Choose Lucky Cat when your current defense can spare cash for wave-end income. It costs 600 battle cash to deploy, has a placement limit of two and provides 150 cash per wave at base. Lucky Paw has a 10% chance to pay double at a wave's end.
Coin Toss at battle upgrade 3 raises income to 1,300 cash per wave and adds attacks. Jackpot at upgrade 5 raises income to 3,000 cash per wave and adds coin bounces across four enemies. Those later upgrades make economy useful for funding a growing defense, but early spending still needs to leave enough damage and air coverage for arriving enemies.
Bandit Raccoon is another Farm unit; find its entry in the unit directory. For decisions about when to invest in income, use the battle cash and Farm guide.

Take Your Squad into a Specific Map
For early story progression, follow the Greenfield Outpost Normal guide for Act-specific placements, upgrade priorities and the Act 3 split-route defense. Its Act 5 route uses a two-player setup.
For Halloween defense, prepare immediate air coverage before taking a story squad into Pumpkin Patch Trick. Flying enemies require ready air attackers by wave 7, and split enemies also need coverage farther along the route. The three-control squad's first Pumpkin Patch attempt ended at wave 8, so its story success does not carry over unchanged.
In a low-DPS discussion, SentientPotato recommended adding a Slime unit described as boosting unit DPS by 18%. Treat that as a recommendation for the described support Slime, separate from King Slime's road-summoning role. For the broader Halloween spending and farming priorities, follow the Hollow Night Candy guide.
FAQ
Does HITS AIR mean a unit can be placed on hills?
No. HITS AIR describes which enemies the unit can attack. Hill placement has a separate eligibility rule. If the preview says Hills are for flying units, choose an eligible unit or move onto valid ground beside the hill. See placement rules.
Does leveling a unit unlock more squad slots?
Squad slots depend on account level, not an individual unit's level. Account levels 5, 15 and 30 unlock the fourth, fifth and sixth slots. Unit XP levels individual units, while Tide Pass XP advances the pass. See player progression.
Is a ten-pull cheaper than ten single summons?
At base prices, Featured and Standard cost 50 Gems per single or 500 per ten-pull, so the currency cost is equal. A ten-pull guarantees at least one Epic or higher. VIP reduces both prices by 20%, to 40 Gems per single or 400 per ten-pull. See summoning prices and guarantees.